Showing posts with label organization. Show all posts

Wednesday, December 10, 2014

Workspace Wednesday and new Weekly Deals.

Last week I showed you my wine cart turned big shot station. This week I will show you my project life storage. 

For my birthday this year, I received an awesome library card catalog. I have always wanted one of these and never really had anything planned for it but just wanted it. Well when I saw it for sale, I knew exactly what I would do with it! It is PERFECT for project life. Well, maybe not completely perfect but I am happy with it. 

I showed the card catalog on here when I first got it with how some of the cards fit in this post. But it was still sitting in my living room while my scrapbook room was being remodeled. 


My room was still not completed when they took this down to the basement for me so excuse the un-sanded drywall and things.  

If you saw the original post you know it had more drawers than this picture. That's because it was in 2 halves. I guess it was more like 4. The two sections of drawers, the pull outs then the top piece were all different pieces. Thank God they were, or it would have been too heavy even for my strong boys to get downstairs! 

I have the bottom section, the pull outs and the top as one piece and I need to make new labels for the drawers but they hold my project life kits. Or most of them anyway. 

You can see they little bars that run through that would have held all the card catalog cards in the drawers so they could not be removed have been taken out and the silver push bars are still there and slide so I can adjust them to how ever big of a card stash I have in that drawer. The small cards fit great and I just put the 4x6 ones in the back of the drawer. I can pull out just the drawer I want to use of flip through any of them every easily. 


These pull outs make great additional workspace when I am working on my pages. 
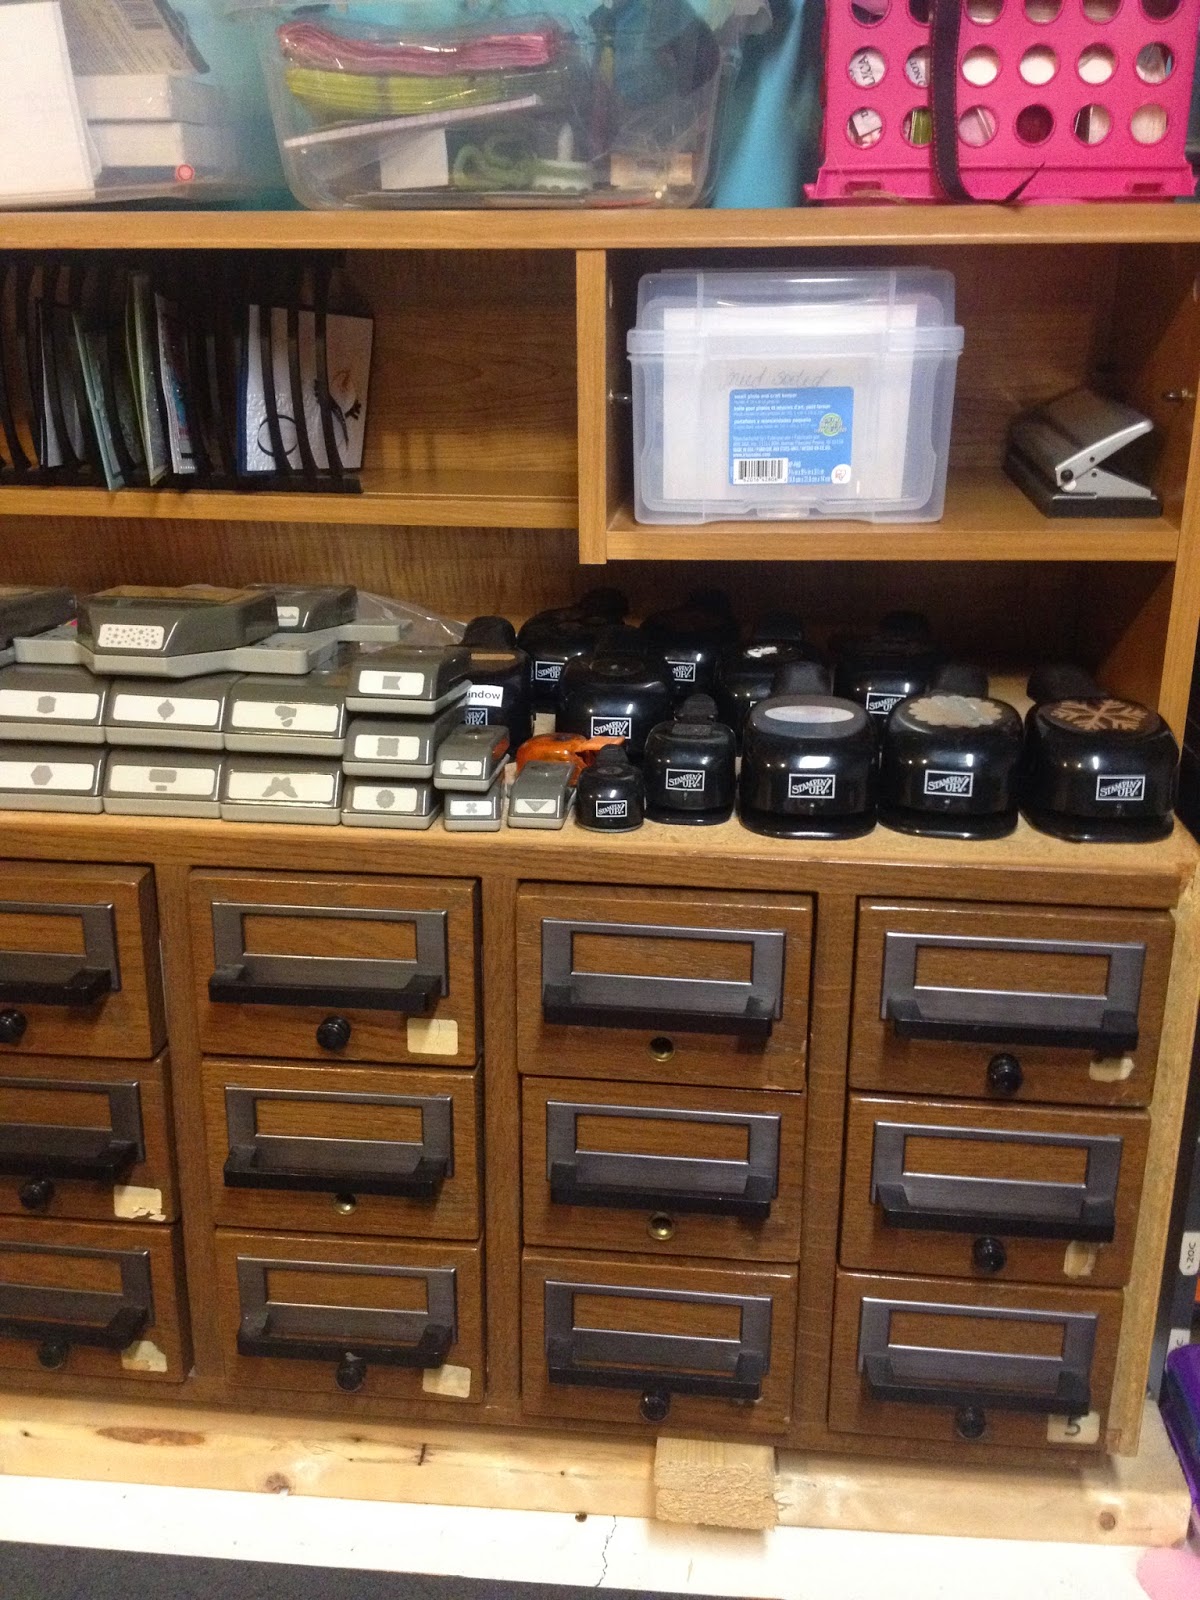


This is the other half. I have it sitting on the ledge in my basement on the other wall by my desk. The drawers hold more PL cards and stamps I just need to label them. And my punches fit on top.  The boards under neath were to give it a little height so when pulling out the bottom drawers they would not hit my desk. Those are temporary and will cut to fit soon. The shelf above the card catalog with the boxes on it is part of a hutch that belongs on my desk. I will get to that next week. 


Now for this weeks Stampin' Up! Weekly Deals! 

For those of you who love Project Life, there are wooden elements and some digital downloads that work great for December Daily projects!


Wednesday, December 3, 2014

Wine and Stamping?

What does wine have to do with stamping or scrapbooking? Nothing really, unless you happen to like to drink a glass while crafting, but that's not what I am getting at.  I have a tendency to see something and think "oh, I can use that!!!" but then it just sits around and I never get to it, or it doesn't work out quite like I thought it would.  But someone on a local facebook group posted this picture for sale:


My first thought was this would make a great big shot station for my classes!! So I got it.  I did use it and I even used it for the reason I bought it. It houses my big shot very nicely.  Before this I had my big shot on an old microwave stand that stood about waist high and my dies, etc were in some little plastic pull out drawers sitting next to it. I had to get up and cross the room to use the big shot or usually just brought it and put it on my table where there wasn't really room for it.  This is perfect height when I am sitting at my desk and sits behind me so I can just spin around, use the big shot and get back to work! 

(excuse the messy drywall behind, these were taken while my room was starting to be redone)


My big shot sits nicely on top, my framelits and cutting pads fit in the spot on top with it for easy access. 
My embossing folders are in the wine bottle slots, 
 And my newer stamps are in the bottom. 

The only problem with it is..... I can't use it for my classes like I had originally thought because it is too heavy to bring up the stairs!

Wednesday, April 30, 2014

Project Life Storage

So you have just started Project Life, or maybe you have been doing it for awhile. Regardless of which you either have more cards then you will probably ever use or you soon will.  While the boxes that the Becky Higgins core and mini kits come in are nice, that is probably not what you will want to keep your cards in.

While I am sure I don't have nearly as many cards as many that get some subscription kits and things do, I have a good size stash.  I will be honest and I did have many of them in the original boxes just because they would stack on the shelf nicely and I wasn't sure where else to put them. But they were not being used that way. I would tend to use the ones that were out near my desk and the ones in the boxes were staying in the boxes.

If you have read any of my recent blog posts then you have heard me mention that my son is redoing my scrapbook room for my birthday.  So all my things got boxed up and moved out of the room so that he could drywall. That got me thinking about my storage and what I wanted to put back in the room when it was done.  I was lucky enough to see this old card catalog in a store window a few months ago and I have been thinking about it ever since. So that was my husbands birthday present to me.


I have 30 wonderful drawers now to keep all my project life items in!! I am over the moon about this!

It is not in perfect condition and I thought about painting it but nothing else in my room matches anyway, why should this. I still need to take the little stickers they had on it off, and put the drawer pulls back on some of the drawers that I took out but I am so happy that the cards fit!  The 4x6 cards I just have in the back of the drawers with their kits.

The top half of 15 drawers actually comes off the bottom so I think that I am going to split it up when I take it to my scrapbook room. (it is in my living room until my room is finished and man is it heavy even when empty)

Here is a close up of the cards in the drawer. This is almost an entire blush core kit in this drawer. The little adjustment things still worked after I removed the bars that the card catalog files were on so it even holds the cards up! LOVE THIS!!!

Now I know many of you like to take project life with you and work on it. This next item may not be the prettiest but I am sure you could dress it up with some papers.

I was in Lowes (probably my favorite NON craft store) and happened to come upon this organizer box made by Kobalt. It is called a 10 compartment organizer. And I bought this with every intention of coming home and using it to put my PL cards in. (before I bought my card catalog)


Well it just so happened that shortly after getting home that evening, my daughters toy box got spilled, and she asked me to help her put everything back in it. I noticed all the little polly pocket, monster high and other pieces in the bottom and went and grabbed this for her tiny toy pieces.

It worked great for her and she picks everything back up and is excited not to have to dig for a missing shoe or purse. But what about project life? Would it fit the cards? I mean that is what I bought it for to begin with.


Well these are 2 of the inserts taken out of the box. The small ones hold the smaller cards but they are a tight fit. I don't think they would easily fall out if you dropped it. The 2 larger boxes (and there are only 2) hold the 4x6 cards with a little wiggle room. You can see 1/2 of a sunshine? kit in these boxes. 


Here is the entire inside picture of the box. I removed some toys to test it out. There are 8 small boxes and 2 large plus the space at the bottom (where the doll skates are) is an open area that would hold journaling pens or glue, etc. I think you could easily put 4 or so core kits or a couple with different minis in here and have an insert or two for embellies and it closes nice and secure. None of the little pieces have came out when it was closed and being carried by my 6 year old so I believe I need to buy me one for a portable PL carrying case. Now to just figure out how to pretty it up. 


Code line 7 9 is for loading jQuery library. Remove this line if you’ve already loaded it somewhere else in your blog. Hint: If your blog has an image slider, carousel or something with fading effect running, chances are it is powered by jQuery. If this widget doesn’t work, the first thing you want to do is comment out or remove this line. To use your own button, replace the URL in line 3 with the direct link URL to the image. Make sure to keep the quotes. To reposition the button, replace